Introduction
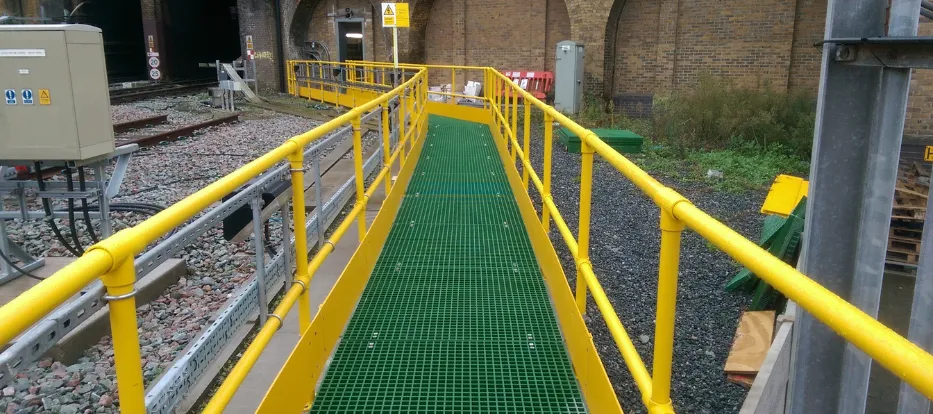
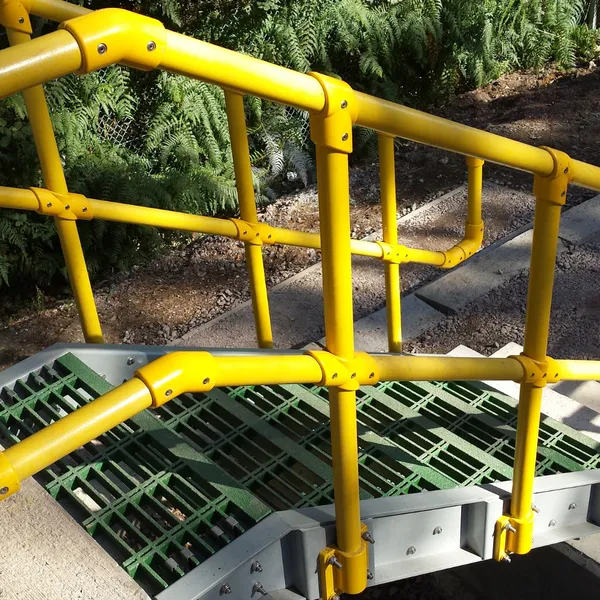
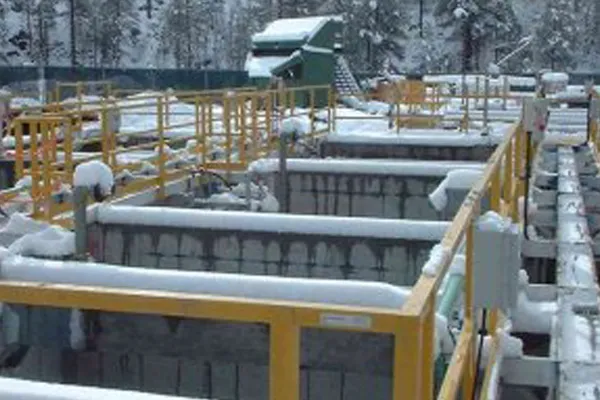
GRP (Glass Reinforced Plastic) handrails, also known as FRP (Fiber Reinforced Plastic) guardrails, offer a superior alternative to traditional steel or aluminum railing systems in demanding industrial environments. Their corrosion resistance, lightweight strength, and low maintenance make them the preferred choice for chemical plants, wastewater treatment facilities, marine platforms, and food processing plants.
This GRP handrail installation guide provides everything you need to know — from the tools required and step-by-step procedures to cost estimates and common pitfalls. Whether you are a facility manager planning an upgrade or a contractor tackling an industrial guard railing installation for the first time, this comprehensive resource will ensure your pultruded fiberglass handrail installation is safe, code-compliant, and built to last.
By the end of this frp guardrail installation guide, you will have a clear understanding of the entire process, including surface preparation, anchoring techniques, assembly methods, and final inspection requirements.
What Is GRP Handrail Installation?
What Are GRP Handrails?
GRP (Glass Reinforced Plastic) handrails are structural railing systems manufactured through a pultrusion process where continuous glass fibers are pulled through a resin bath and then through a heated die. This creates incredibly strong, lightweight profiles that rival steel in strength while weighing up to 75% less. The term "FRP" (Fiber Reinforced Plastic) is often used interchangeably with GRP, as both refer to the same composite material technology.
Why Choose Pultruded Fiberglass Handrail Systems?
The pultruded fiberglass handrail system installation process has become increasingly popular across industries because of the material's unique advantages. Unlike carbon steel, GRP will not rust or corrode when exposed to chemicals, saltwater, or humidity. Unlike aluminum, it does not conduct electricity, making it ideal for electrical substations and power generation facilities.
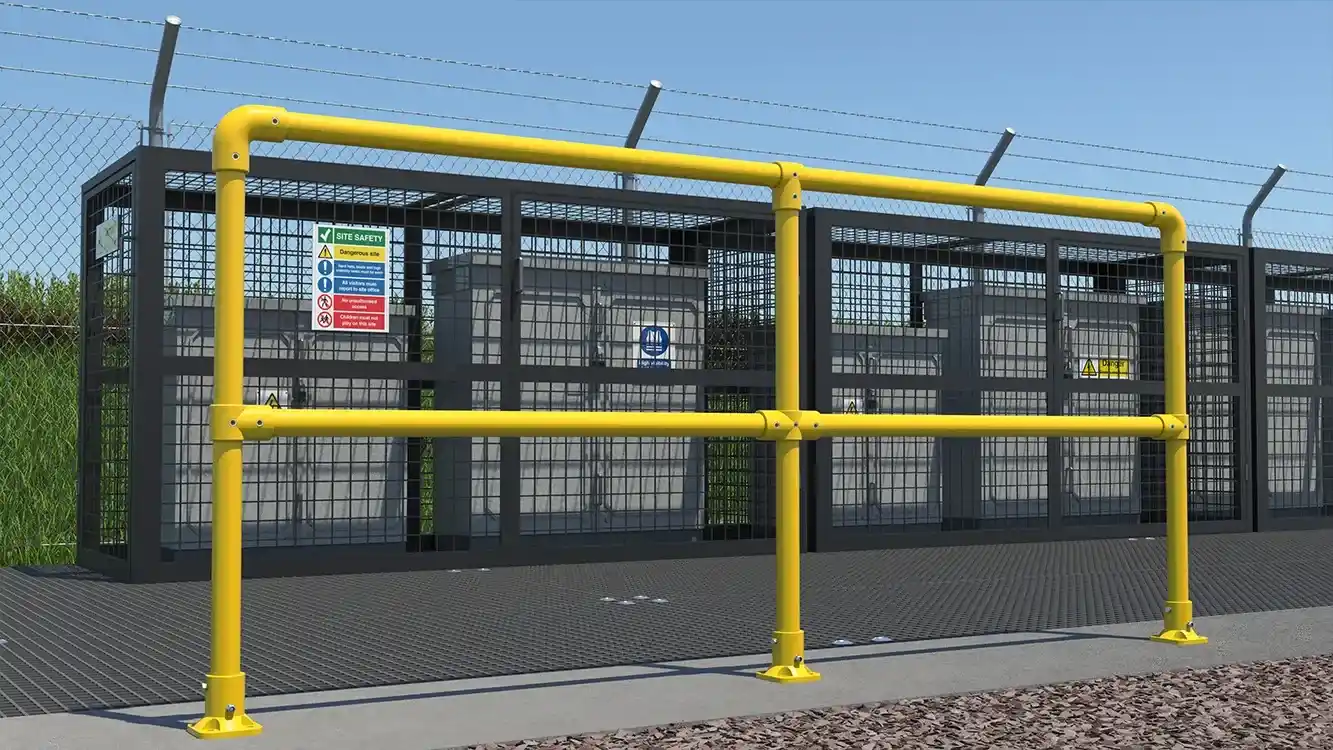
A complete frp railing system installation typically includes handrail posts, top rails, mid-rails, toe boards, and all necessary connection brackets and fasteners. These components are designed to modularly fit together, allowing for flexible configurations on stairways, platforms, catwalks, and perimeter edges.
The key to a successful industrial safety guardrail installation lies in understanding the specific load requirements and environmental conditions of your site. OSHA and IBC code compliance should drive your design choices, including post spacing, rail height, and load ratings. Most standard industrial guard railing installation specifications call for 42-inch top rail height with intermediate rails spaced to prevent a 21-inch sphere from passing through.
Tools and Materials Needed for FRP Railing Setup
Before beginning any FRP railing setup, you must gather the correct tools and materials. Having everything on hand before you start will significantly reduce installation time and prevent frustrating delays.
Essential FRP Guardrail Installation Tools
| Tool Category | Specific Tools Required | Purpose |
|---|---|---|
| Measuring & Layout | Tape measure, chalk line, level, laser distance meter | Mark post locations and ensure proper alignment |
| Cutting | Carbide-tipped saw blade, miter saw, angle grinder | Cut GRP profiles to exact length |
| Drilling | Hammer drill, masonry bits, step drill bits | Drill anchor holes in concrete surfaces |
| Fastening | Torque wrench, socket set, impact driver | Secure anchor bolts and connection hardware |
| Safety | Safety glasses, dust mask, hearing protection, work gloves | Protect against GRP dust and debris |
Materials Checklist for FRP Guardrail Installation
- GRP handrail posts — typically 2" × 2" or 3" × 3" square tube profiles
- Top rail and mid-rail sections — matching profile dimensions
- Toe boards — for raised platforms where required by code
- Stainless steel expansion anchors or epoxy anchors — for concrete attachment
- Stainless steel connection brackets and corner fittings
- End caps and cover plates
- Anti-slip base plates — pre-drilled for anchor bolt patterns
- Thread-locking compound — for vibration-prone environments
Using the correct frp guardrail installation tools is critical. Regular steel-cutting blades will dull quickly on GRP material due to the abrasive glass fibers. Always use carbide-tipped or diamond-coated cutting tools for clean, accurate cuts that prevent delamination of the pultruded profiles.
How to Install GRP Handrail on Concrete Surface: Step-by-Step Guide
This step-by-step pultruded fiberglass handrail installation instructions cover the most common scenario: installing a fiberglass railing system on a concrete surface. Follow these frp guardrail installation steps carefully to ensure a safe, durable, and code-compliant result.
Step 1: Preparation and Layout Marking
Begin by carefully measuring the installation area and marking post locations. Typical post spacing for industrial guard railing installation ranges from 4 to 6 feet on center, depending on the load rating required. Use a chalk line to establish a straight reference line, then mark each post center with a marker. Double-check all measurements — once anchor holes are drilled, repositioning is difficult and may compromise the concrete surface.
Set the first and last posts first, then stretch a string line between them to ensure all intermediate posts are perfectly aligned. For corner applications, use pre-fabricated corner posts or standard posts with corner brackets rated for the required load.
Step 2: Drilling and Setting Anchor Bolts
Using a hammer drill with a masonry bit matched to your anchor diameter, drill holes at each marked post location. The hole depth should match the manufacturers specification for your chosen anchor type — typically 2.5 to 4 inches for expansion anchors in 4000 PSI concrete. Clean each hole thoroughly using a wire brush and compressed air or a blow bulb. Debris left in the hole will significantly reduce anchor holding strength.
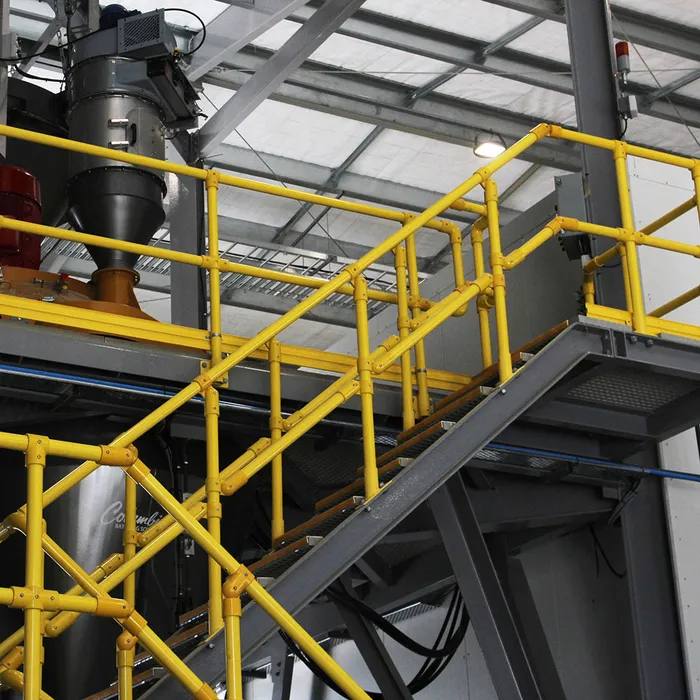
For epoxy anchors, inject the epoxy into the cleaned hole, then insert the threaded rod with a slight twisting motion to ensure full coverage. For expansion anchors, insert the anchor body flush with the concrete surface before tightening. Allow epoxy to fully cure per manufacturer instructions — typically 1 to 24 hours depending on temperature.
Step 3: Mounting the Posts
Position each GRP post onto its corresponding anchor with the base plate sitting flat on the concrete. Install stainless steel washers and nuts onto the threaded anchors, then tighten to the torque specification provided by the anchor manufacturer — typically 30-50 ft-lbs for 1/2-inch anchors. Use a torque wrench to ensure consistent tightening across all posts. Over-tightening can fracture the concrete or strip the anchor threads.
Check each post for plumb (vertical alignment) using a level on two adjacent faces. If a post is not perfectly plumb, use stainless steel shims under the base plate to adjust. Never force a post into alignment by over-tightening one side of the anchor bolts.
Step 4: Installing the Handrail and Mid-Rails
Once all posts are securely mounted and verified plumb, install the top rail. Measure and cut each section of top rail to fit precisely between posts, accounting for any brackets or connection fittings. GRP can be cut using a miter saw with a carbide-tipped blade — ensure cuts are square and free of splintering.
Attach the top rail using stainless steel connection brackets at each post, securing with the provided bolts and washers. Apply thread-locking compound to prevent loosening from vibration. Install mid-rails at the required height — typically midway between the top rail and the walking surface. For OSHA-compliant industrial safety guardrail installation, the intermediate rail should be installed so the gap between the top rail and mid-rail does not exceed 21 inches.
Step 5: Final Inspection and Testing
After assembly, perform a thorough inspection of the entire frp railing system installation. Verify all bolts are tightened to correct torque, all connections are secure, and the railing system can withstand the required load rating. For OSHA compliance, the system must withstand a 200-pound force applied downward or outward at any point on the top rail. Conduct a visual check for any sharp edges, splinters, or damaged components that could pose a safety hazard.
Can You Install FRP Railings Yourself? DIY vs Professional Installation
One of the most common questions about FRP railing setup is whether it is a suitable DIY project. The answer depends on the scope of work, your skill level, and the specific requirements of your installation.
DIY Installation: What You Need to Know
A homeowner or small facility manager with basic construction skills can successfully handle a straightforward pultruded fiberglass handrail installation with proper planning and the right tools. GRP materials are significantly lighter than steel — a standard 10-foot section of GRP handrail weighs approximately 8-10 pounds compared to 30-40 pounds for steel — making them much easier to handle without heavy equipment or a large crew.
If you are installing a short section of handrail on a concrete surface (under 50 linear feet) with simple straight runs, DIY installation is entirely feasible. The frp guardrail installation guide steps outlined earlier can be followed by a competent DIYer, provided they have access to a hammer drill, carbide-tipped saw blade, and torque wrench.
When to Hire a Professional
For larger installations, complex configurations, or critical safety applications, hiring an experienced contractor is strongly recommended. Industrial facilities with stringent OSHA requirements, elevated platforms over 6 feet, or installations in corrosive environments often require professional engineering review and certified installation.
Professional installers bring several advantages: they carry specialized tooling for high-volume work, understand local building codes and permit requirements, can correctly calculate load ratings and post spacing, and typically offer workmanship warranties. For an industrial guard railing installation covering hundreds of linear feet across multiple elevations, the cost of professional installation is a worthwhile investment in safety and compliance.
How Long Does Composite Handrail System Installation Take?
The time required for a composite handrail system installation varies significantly based on the project size, complexity, and site conditions. Below are realistic time estimates for different installation scenarios.
| Installation Scope | Estimated Time | Notes |
|---|---|---|
| Small section (10-20 linear ft) | 4-6 hours | Single person, simple straight run on concrete |
| Medium platform (50-100 linear ft) | 1-2 days | Two-person crew, includes corners and mid-rails |
| Large industrial area (200+ linear ft) | 3-5 days | Professional crew, multiple elevations, complex layout |
| Full staircase with landings | 2-3 days | Requires angled cuts, handrail bends, more fittings |
Several factors can extend the installation timeline. Epoxy anchor cure time adds 1-24 hours before posts can be loaded. Concrete that is less than 28 days old may not have sufficient strength for proper anchoring. Inclement weather can delay outdoor pultruded fiberglass handrail system installation as most adhesives and epoxies require temperatures above 50°F (10°C) for proper curing.
Site preparation also plays a role. If existing railing needs to be removed first, add 1-2 hours for demo and disposal. If the concrete surface is uneven or damaged, you may need additional time for surface preparation or shimming. A well-planned frp guardrail installation guide should always include buffer time for unexpected conditions encountered on site.
Common FRP Railing Installation Mistakes to Avoid
Even experienced installers can make mistakes during fiberglass guardrail mounting. Being aware of these common pitfalls will help you avoid costly rework and ensure your industrial safety guardrail installation meets all code requirements.
1. Incorrect Post Spacing
The most frequent error in pultruded fiberglass handrail installation is spacing posts too far apart to achieve the required load rating. While GRP is strong, the handrail deflection under load increases significantly with wider post spacing. Always follow the manufacturers specified maximum post spacing, which typically ranges from 4 to 6 feet depending on the profile size and wall thickness.
2. Using Wrong Anchor Type
Using standard wedge anchors in cracked concrete or epoxy anchors in wet holes are common mistakes that lead to post failure. Match the anchor type to your specific substrate conditions. For outdoor industrial guard railing installation exposed to freeze-thaw cycles, use corrosion-resistant stainless steel anchors. Always test anchor pull-out strength on a sample installation before committing to the full run.
3. Over-Tightening Bolts on GRP Material
GRP is a composite material and can be damaged by excessive clamping force. Unlike steel, which can tolerate high bolt torque without damage, GRP profiles can crack or delaminate if bolts are over-tightened. Use a torque wrench and follow the manufacturers recommended torque values. A general guideline for most GRP railing connections is 15-25 ft-lbs for bolted connections, significantly less than typical steel railing torques.
4. Not Accounting for Thermal Expansion
GRP has a different coefficient of thermal expansion than steel or concrete. In long runs of frp railing system installation, failing to include expansion gaps can cause the railing to buckle in hot weather or pull apart in cold weather. Install expansion joints every 50-100 linear feet as recommended by the manufacturer, and use slotted connection holes to allow for slight movement.
5. Poor Cutting Techniques
Cutting GRP with dull blades or excessive feed speed causes splintering, fuzzing, and delamination at the cut edges. These damaged areas are entry points for moisture and chemicals, reducing the lifespan of the railing. Always use sharp carbide-tipped blades, cut at the proper speed, and seal any exposed cut edges with the recommended gel coat or sealant provided by the railing manufacturer.
6. Ignoring Code Requirements
Each jurisdiction has specific building codes governing handrail height, load capacity, baluster spacing, and toe board requirements. Failing to verify local codes before starting a pultruded fiberglass handrail system installation can result in failed inspections and expensive modifications. OSHA 1910.29 and IBC 1607.8 are the primary reference standards in the United States, but local amendments may apply.
How Much Does Fiberglass Guardrail Mounting Cost?
The cost of FRP guardrail installation depends on several variables including material grade, project complexity, labor rates, and site accessibility. Understanding these cost drivers will help you budget accurately for your pultruded fiberglass handrail system installation.
Material Costs
GRP handrail materials are priced per linear foot and vary by profile size and resin system. Standard vinyl ester-based GRP handrail typically costs $25-45 per linear foot for the complete system including posts, rails, brackets, and hardware. For specialized fire-retardant or chemical-resistant resin systems, expect pricing in the $35-60 per linear foot range.
Installation Labor Costs
Labor costs for professional industrial guard railing installation typically range from $50-100 per hour depending on your region and the contractors expertise. On average, total installed cost (materials plus labor) for a complete GRP railing system falls between $45-80 per linear foot.
| Cost Component | Typical Range |
|---|---|
| GRP handrail materials (per linear ft) | $25 - $45 |
| Stainless steel fasteners and anchors | $3 - $8 per post |
| Corner fittings and specialty brackets | $15 - $40 each |
| Professional labor (per hour) | $50 - $100 |
| Total installed cost (per linear ft) | $45 - $80 |
| Engineering and permit fees | $500 - $2,000 project |
Cost-Saving Tips for FRP Guardrail Installation
- Order complete kits — Pre-engineered frp railing system installation kits from manufacturers reduce waste and ensure all components match correctly.
- Prepare the surface in advance — Having clean, level concrete ready for installation reduces on-site labor time. Any concrete repair or surface leveling should be completed before the installation crew arrives.
- Bundle installation with other work — If you are already having contractors on site for other structural work, adding the railing installation to their scope often results in better rates and coordinated scheduling.
- Consider DIY for simple runs — As discussed in the DIY section, straightforward straight runs under 50 linear feet on flat concrete can be successfully completed by a competent DIYer, saving $500-1,000 in labor costs.
Conclusion
A properly executed GRP handrail installation delivers decades of reliable service with virtually no maintenance. The corrosion resistance and structural durability of pultruded fiberglass make it the ideal choice for challenging environments where traditional metal railings would fail within months.
To recap the essential steps for a successful pultruded fiberglass handrail installation:
- Plan your layout carefully and verify all measurements before drilling
- Use the correct frp guardrail installation tools — carbide-tipped blades, hammer drill with proper masonry bits, and a torque wrench
- Select anchors appropriate for your substrate and environmental conditions
- Follow the frp guardrail installation steps in sequence — layout, drill, mount posts, install rails, inspect
- Allow adequate time for epoxy curing and avoid rushing the process
- Work with a professional installer for complex or large-scale industrial safety guardrail installation projects
Whether you are an experienced contractor or a facility manager overseeing an upgrade, this frp guardrail installation guide provides the foundational knowledge needed to ensure a safe, code-compliant, and long-lasting railing system. Always consult the manufacturer's specific installation manual for your chosen product, as details may vary between different GRP railing brands and profile configurations.
For further assistance with your specific project, contact our technical team who can provide product recommendations, installation support, and engineering documentation for your frp railing system installation.